French page 1-18 – English page 19-38
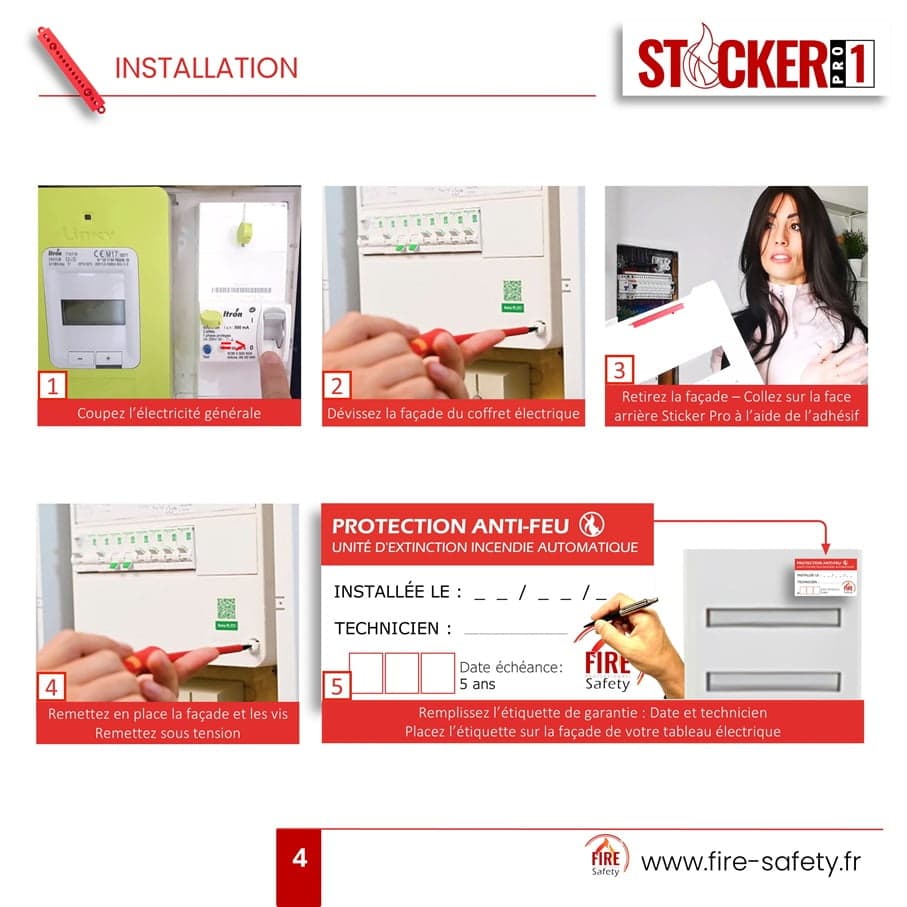
Installing the Sticker Pro1 fire extinguisher sticker in your electrical panel couldn’t be easier! It takes just 2 minutes for an amateur.
If you’re here, it’s because this innovative automatic fire detection and extinguishing system has convinced you. We’re delighted. This fire protection system is easy to use and install.
Simply open the fire extinguisher sticker pack and you’ll find an instruction leaflet with images to help you find your way around quickly.
Please read the entire Sticker Pro1 manual before starting installation.
As you can see, your fire protection equipment is child’s play to install. You’re safe and sound.
While you’re away, the automatic fire extinguisher sticker protects you. It detects any rise in temperature and activates at 160°C or on contact with a flame. So your house, apartment or even your premises won’t go up in smoke.
This device saves property and, above all, lives!